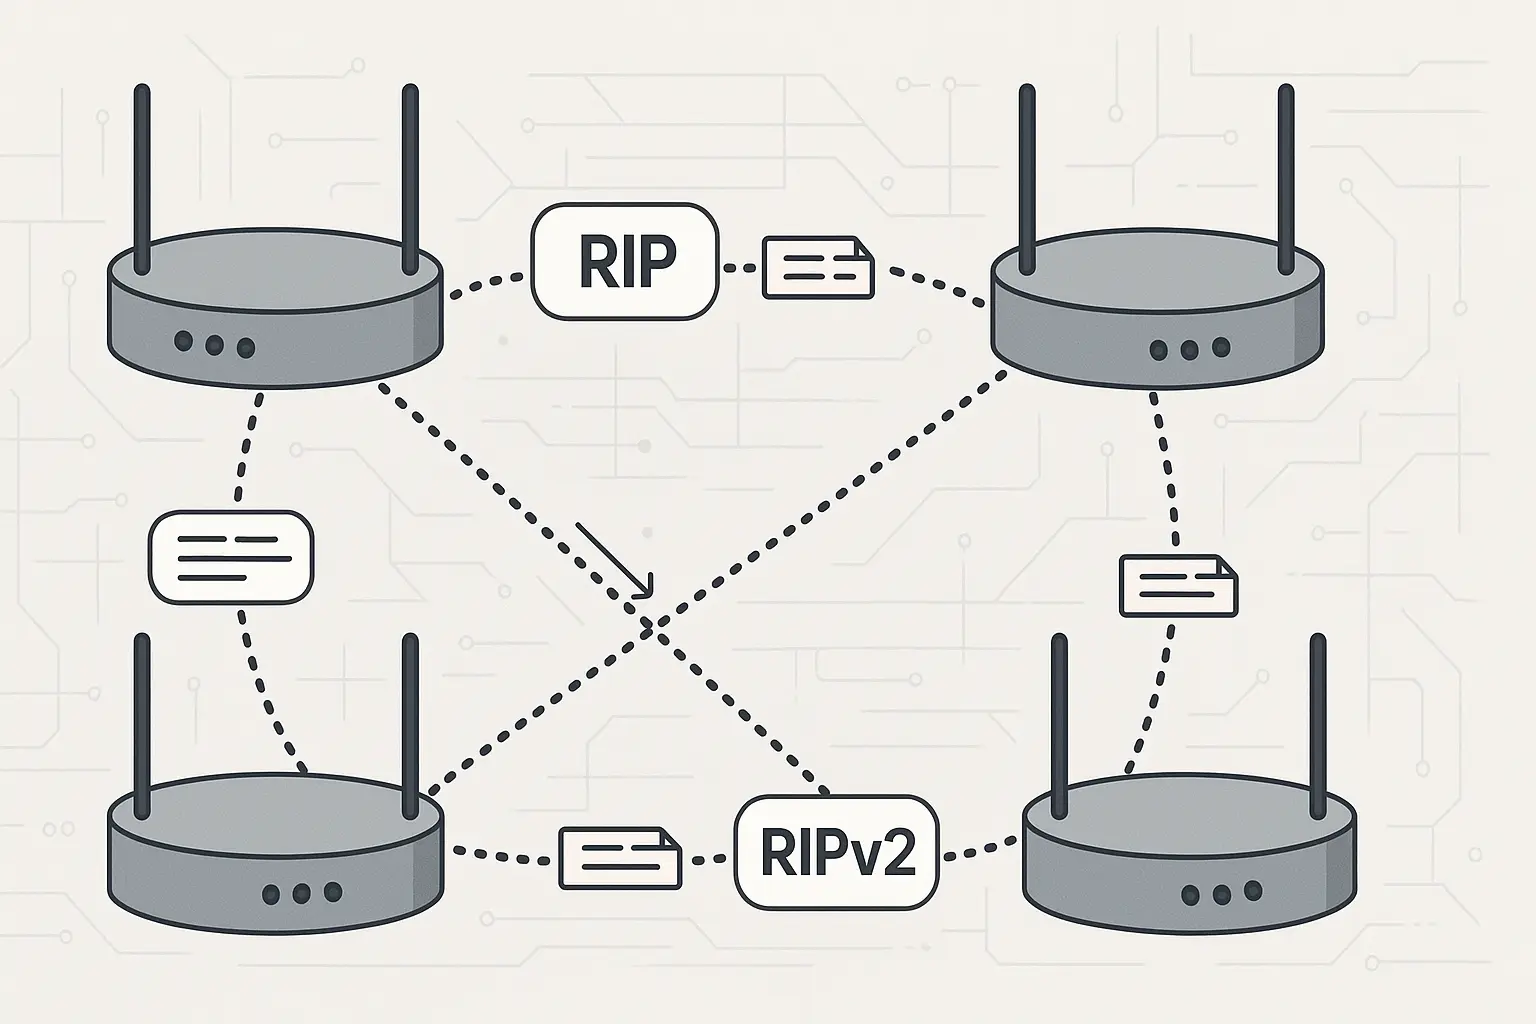
RIP Protocol (Routing Information Protocol) is one of the oldest distance-vector routing protocols. It’s simple, uses hop-count as its metric (max 15), and is useful for small or lab networks and for learning routing basics. Below, I’ll explain RIP, differences between RIPv1/RIPv2/RIPng, timers, common problems, and give clear Cisco configuration examples (including authentication) you can copy into your lab.
1. Introduction
RIP (Routing Information Protocol) is a distance-vector routing protocol originally designed for small IP networks. It advertises whole routes periodically, uses hop-count as its metric (1 hop per router), and has a built-in limit: a metric of 16 means “unreachable.” That simplicity makes RIP easy to configure, but also limits its scalability and convergence speed compared with modern protocols such as OSPF or EIGRP.
2. How RIP Protocol Works
- Type: Distance-vector protocol — routers periodically send their full routing table to neighbors.
- Metric: Hop count (lowest hops wins). Maximum usable hop count is 15; 16 = unreachable.
- Transport: RIP messages are carried over UDP (RIP uses UDP port 520).
- Update behavior: Periodic updates (default 30 seconds) and triggered updates on change.
- Convergence: Slow compared to link-state protocols; susceptible to count-to-infinity problems mitigated by techniques like split horizon, route poisoning and hold-down timers (explained below).
3. Key Features of RIP
- Simple configuration — good for small networks and labs.
- Periodic updates — default every 30s (can be tuned).
- Hop-count metric — easy to understand but limits scalability.
- Administrative distance (AD): 120 (so other protocols with lower AD take precedence).
- Versions: RIPv1 (classful), RIPv2 (classless + auth), RIPng (IPv6).
- Sends updates via UDP port 520 (RIP) and uses multicast address for RIPv2 updates.
4. Versions of RIP — what changed and why it matters
4.1 RIP v1 (RIPv1)
- Classful: Does not carry subnet mask info — cannot support VLSM/VPN discontiguous networks properly.
- Broadcasts updates (limited network efficiency).
- No authentication.
- Good historically and for tiny legacy networks; not recommended where subnets vary.
4.2 RIP v2 (RIPv2)
- Classless: Carries subnet mask in updates (supports VLSM/CIDR).
- Multicast updates to 224.0.0.9 (reduces unnecessary hosts processing updates).
- Authentication support (plain text and MD5).
- Backward compatible in receiving mode with RIPv1 (but mixed environments can behave oddly — best to standardize on v2).
4.3 RIPng (RIP Next Generation)
- RIP for IPv6.
- Uses UDP port 521 and IPv6 link-local multicast FF02::9.
5. RIP Timers and How They Work
RIP uses four timers (default Cisco values shown):
- Update timer: 30 seconds — it is the interval between the routing updates.
- Invalid timer: 180 seconds — if no updates are heard for a route within this time the route is marked invalid.
- Hold-down timer: 180 seconds — the router will be in the hold-down state during this period. This is done after an update packet is received telling that a certain route is unreachable.
- Flush timer: 240 seconds — it is the period between the route ‘invalid’ state, and its removal from the routing table.
These timers are part of why RIP converges slowly. Cisco and other vendors allow changing these timers, but do so carefully — incorrect tuning can increase instability.
Mitigation of count-to-infinity: RIP uses techniques like split horizon, route poisoning (set metric to 16 to indicate unreachable), and hold-down to limit the effects of routing loops and slow convergence.
6. Advantages and Limitations
Advantages
- Very easy to configure and understand.
- Works fine for small topologies and labs.
- Broad vendor support.
Limitations
- Max 15 hops — not suitable for larger networks.
- Slow convergence and periodic full-table updates (greater bandwidth/CPU overhead).
- Security: plain RIP has no authentication; use RIPv2 with MD5 where possible.
- Not appropriate as a backbone protocol for medium/large enterprise — use OSPF/EIGRP/IS-IS/BGP instead.
7. RIP vs Other Routing Protocols — quick comparison
- RIP vs OSPF: OSPF is link-state, scales much better, converges faster; OSPF is preferred for medium/large networks.
- RIP vs EIGRP: EIGRP (Cisco) converges faster, supports more features and metrics.
- RIP vs BGP: BGP is for inter-AS/internet routing (policy based), not comparable to RIP’s simple IGP role.
- When to use RIP: Very small networks, labs, training and when you need the absolute simplest routing setup.
8. How to Configure RIP on Cisco Routers — step-by-step
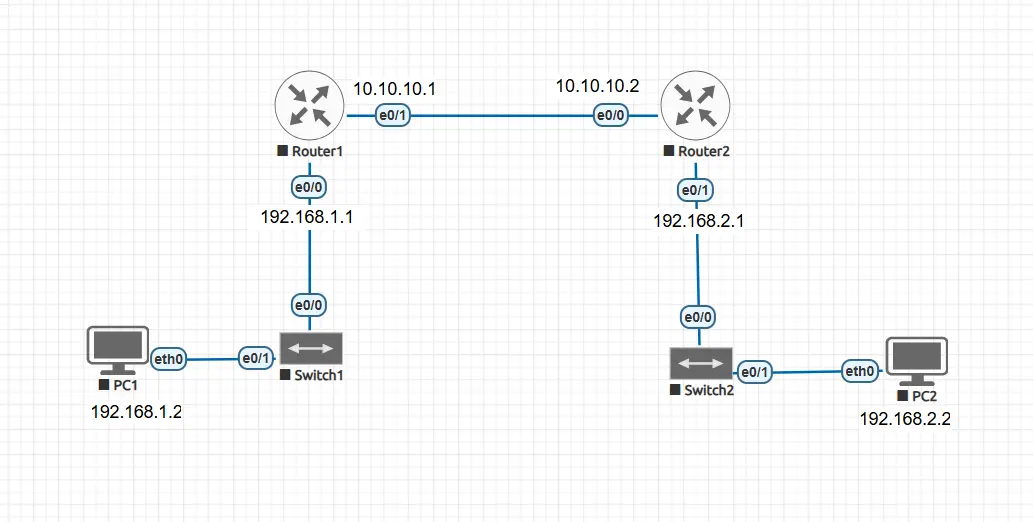
To understand RIP better, let’s take a simple network example.
We have two routers connected back-to-back, with each router also connected to a LAN.
- Router1 connects to PC1 (192.168.1.2) on one side and to Router2 using a serial/ethernet link (10.10.10.0/30 network).
- Router2 connects to PC2 (192.168.2.2) on the other side.
In this setup:
- Router1 knows only about its directly connected networks (192.168.1.0/24 and 10.10.10.0/30).
- Router2 knows only about its directly connected networks (192.168.2.0/24 and 10.10.10.0/30).
Without a routing protocol, Router1 cannot reach 192.168.2.0 and Router2 cannot reach 192.168.1.0.
This is where RIP comes in. By enabling RIP on both routers, they will automatically exchange network information and allow PC1 and PC2 to communicate with each other.
8.1 Basic RIPv1 configuration
Router1> enable
Router1# configure terminal
Router1(config)# router rip
Router1(config-router)# network 192.168.1.0
Router1(config-router)# network 10.10.10.0
Router1(config-router)# exit
Router1(config)# end

Router2> enable
Router2# configure terminal
Router2(config)# router rip
Router2(config-router)# network 192.168.2.0
Router2(config-router)# network 10.10.10.0
Router2(config-router)# exit
Router2(config)# end
Router2# write memory
Here, we simply enable RIP and advertise the connected networks.
Since RIP v1 is a classful protocol, it does not send subnet mask information and works only with classful boundaries.
8.2 RIPv2 configuration
Router1> enable
Router1# configure terminal
Router1(config)# router rip
Router1(config-router)# version 2
Router1(config-router)# no auto-summary
Router1(config-router)# network 192.168.1.0
Router1(config-router)# network 10.10.10.0
Router1(config-router)# exit
Router1(config)# end

Router2> enable
Router2# configure terminal
Router2(config)# router rip
Router2(config-router)# version 2
Router2(config-router)# no auto-summary
Router2(config-router)# network 192.168.2.0
Router2(config-router)# network 10.10.10.0
Router2(config-router)# exit
Router2(config)# end
In RIP v2, we add two extra commands:
version 2→ tells the router to use RIP v2 (supports classless routing).no auto-summary→ prevents automatic summarization at classful boundaries.
This allows proper routing in networks with subnets of different masks (VLSM), which RIP v1 cannot handle.
✅ After applying RIP (v1 or v2), both routers will exchange routes.
- Router1 will learn about
192.168.2.0/24from Router2. - Router2 will learn about
192.168.1.0/24from Router1.
As a result, PC1 and PC2 can now ping each other successfully.
8.3 Configure authentication in RIPv2 (plain text and MD5)
Use authentication to prevent unauthorized RIP updates. Best practice: use MD5 when possible.
1) Create a key chain:
Router1(config)# key chain RIPKEY
Router1(config-keychain)# key 1
Router1(config-keychain-key)# key-string MyRIPPass123
R1(config-keychain-key)# exit
2) Apply to the interface and select MD5:
R1(config)# interface GigabitEthernet0/0
R1(config-if)# ip rip authentication mode md5
R1(config-if)# ip rip authentication key-chain RIPKEY
R1(config-if)# exit
For plain text (not recommended) you can use:
R1(config-if)# ip rip authentication mode text
R1(config-if)# ip rip authentication key-chain RIPKEY
This interface-level approach configures the router to use the key chain you created to authenticate RIP updates (MD5 preferred). Different Cisco platforms/IOS variants show slightly different command layouts, but the key chain + ip rip authentication mode {text|md5} + ip rip authentication key-chain NAME pattern is the typical method.
8.4 Useful verification & debug commands
show ip route— see routing table (R entries = RIP learned).show ip route rip— show only RIP routes.show ip protocols— show RIP process, timers, networks, and whether authentication is in use.show ip rip database— shows RIP route entries (platform dependent).debug ip rip— live RIP packets (use cautiously in production; high CPU).
Example (expected snippet):
R1# show ip route
...
R 192.168.3.0/24 [120/3] via 10.0.12.2, 00:01:12, GigabitEthernet0/0
...
Here R = route learned via RIP, [120/3] = AD 120 / metric 3 hops.
9. Common Problems & Troubleshooting Checklist
- No route learned: Check
show ip protocolsandshow ip interface brief— ensure RIP is enabled on the correct interfaces vianetworkstatements. - Mismatched RIP versions: One side sending v1 and other expecting v2 can cause incomplete communication. Ensure
version 2is configured or allow sending/receiving both as required. - Authentication mismatch: If you configure MD5/plain text make sure keys and key-IDs match on both sides.
- Passive interface accidentally set: You’ll advertise the network but won’t exchange updates on that interface.
- Auto-summary causing unexpected prefixes: Use
no auto-summarywhen you have discontiguous subnets. - ACLs or firewall blocking UDP 520: Ensure UDP 520 traffic is permitted between neighboring routers.
- High CPU with
debug ip rip— enable with care on production routers.
10. Real-World Use Cases
- Training & CCNA labs: RIP is great for teaching routing basics.
- Tiny branch or lab networks: If environment is small and simple, RIP may be sufficient.
- Compatibility/scenarios with legacy devices that only support RIP.
11. Security & Operational Recommendations
- Prefer RIPv2 + MD5 over RIPv1 and plain text. Configure MD5 key chains on the interfaces between routers.
- Use passive-interface on LANs so hosts don’t needlessly receive RIP updates.
- Avoid RIP on wide or production networks; adopt OSPF/EIGRP/IS-IS where scaling and fast convergence are required.
- Monitor with
show ip protocolsand set up proper logging/monitoring for routing flaps.
12. Quick Reference: Important Facts
- Protocol: RIP (distance vector)
- Metric: Hop count (max 15; 16 = unreachable).
- Transport: UDP port 520 for IPv4 RIP, 521 for RIPng (IPv6).
- RIPv2 multicast: 224.0.0.9 (instead of broadcast).
- Timers (Cisco defaults): Update 30s / Invalid 180s / Hold-down 180s / Flush 240s.
- Administrative distance: 120.
13. Conclusion
RIP is simple, predictable, and excellent for learning routing. For modern networks, however, its limitations (15-hop cap, slow convergence) usually mean administrators choose OSPF/EIGRP/IS-IS or BGP depending on scale. If you must use RIP, use RIPv2 with MD5 authentication, no auto-summary where necessary, and secure/control updates with passive-interface and ACLs.
📌 Read More
Cybersecurity blogger with a focus on firewalls, network security, and tech trends making security simple for everyone, from IT pros to curious minds.